


Also bought

Video
Introduction
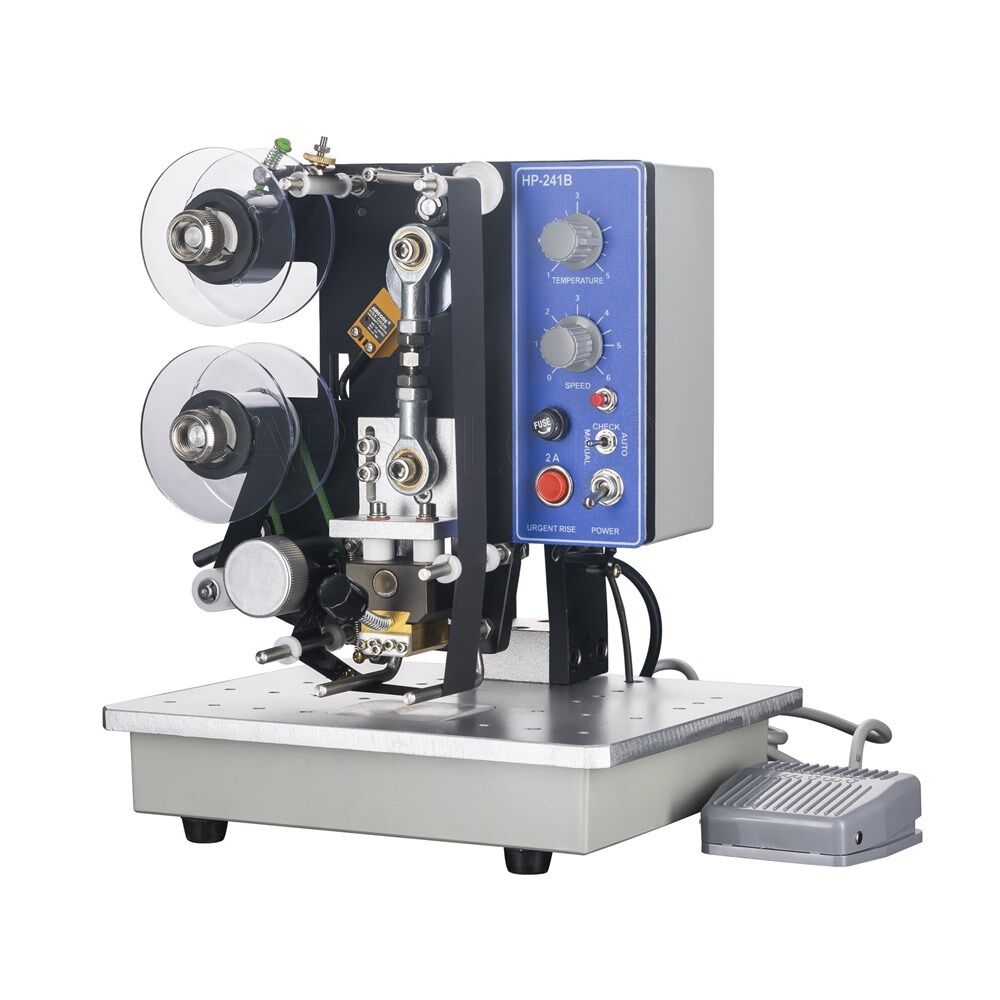
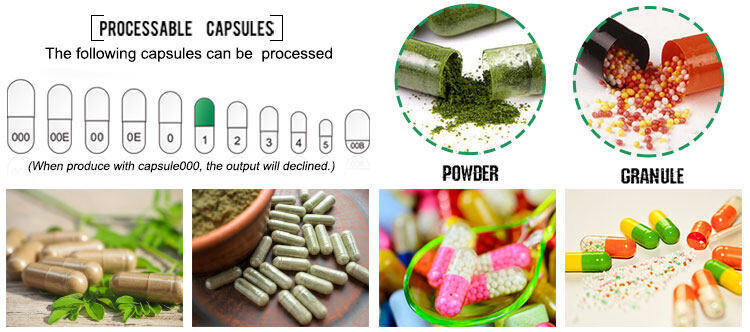
Hot code printer ideal for imprinting date codes, lot numbers, expiration dates, and other letters/numbers into plastic and paper bags. A great way to keep track of your products. This is a great little machine for adding traceability to your products by adding a lot number, date code, or other important information.
Machine is sold complete with an assortment of numbers and letters to imprint on to your packages. Additional numbers and letters available if needed. The machine is widely used in food and pharmaceutical industries
Specifications
| Model | HP-241B |
|---|---|
| Speed | 0-100times/min |
| Thermal printing ribbon | 25mm 30mm 35mm |
| Number of prints | 2*4 max36. |
| Heating tube | 150W |
| Power supply | 220V 50Hz/110V 60Hz |
| Dimension | 250*220*330mm |
| Weight | 7kg |
Remarks
- Clear writing - easy to dry non-stick, clear writing, especially suitable for food and drug packaging.
- Adjustable temperature - electronic constant temperature control, can set different temperatures, adapt to low, medium and high temperature ribbons.
- Easy word change - the compact structure makes the movable type loading and unloading particularly convenient.
- Simple operation - reasonable design, precise machining, and reliable machine operation.
- Diverse printing - printable manufacturing date, batch number, expiration date, weight and other words.
- The printed materials are widely used - they can be printed on plastic films, various plastic composite films, aluminum-plastic composite films, paper, over-plastic paper, leather, plastic products, etc.
Structure
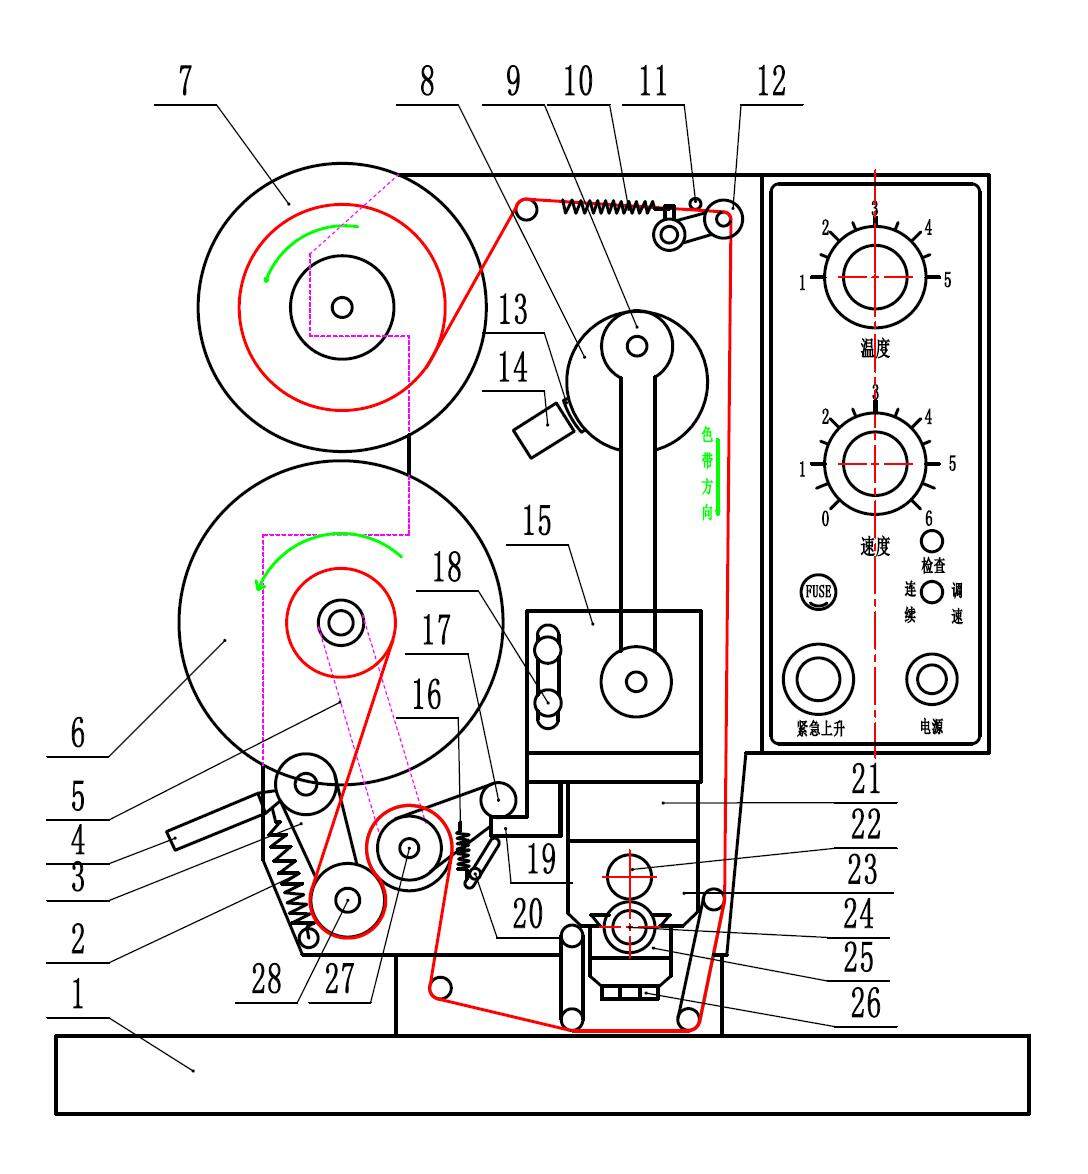
| 1.Base | 2.Spring | 3.Swing arm | 4.Handle |
| 5.Transmission belt | 6.Take-up wheel | 7.Feed wheel | 8.Eccentric wheel |
| 9.Link | 10.Tensioner tension spring | 11.Stop column | 12.Limit puller |
| 13.Sensing block | 14.Proximity switch | 15.Right angle bracket | 16.Stepping spring |
| 17.Stepping arm wheel | 18.Stepping arm screw | 19.Step arm | 20.Step adjustment screw |
| 21.Insulation block | 22.Heater | 23.Heating block | 24.Block handle |
| 25.Print head | 26.Copper grain | 27.Step wheel | 28.Ribbon roller |
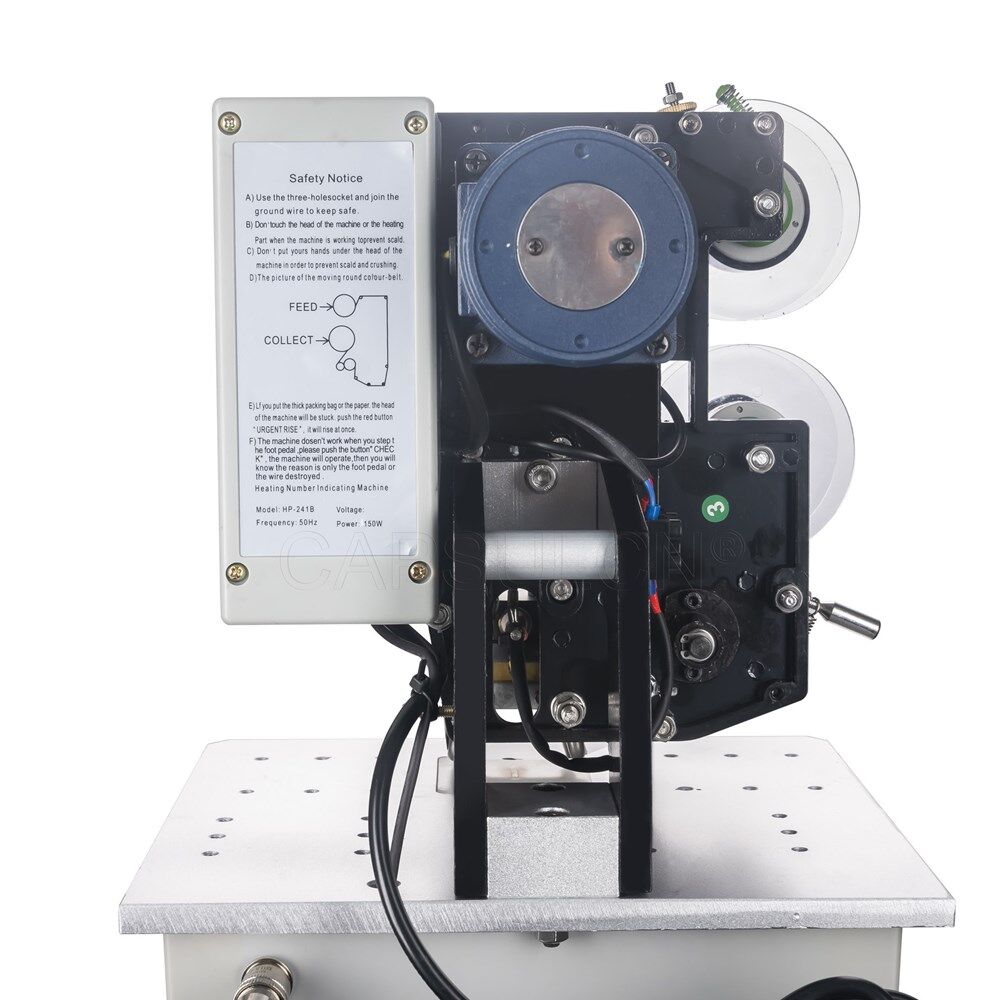
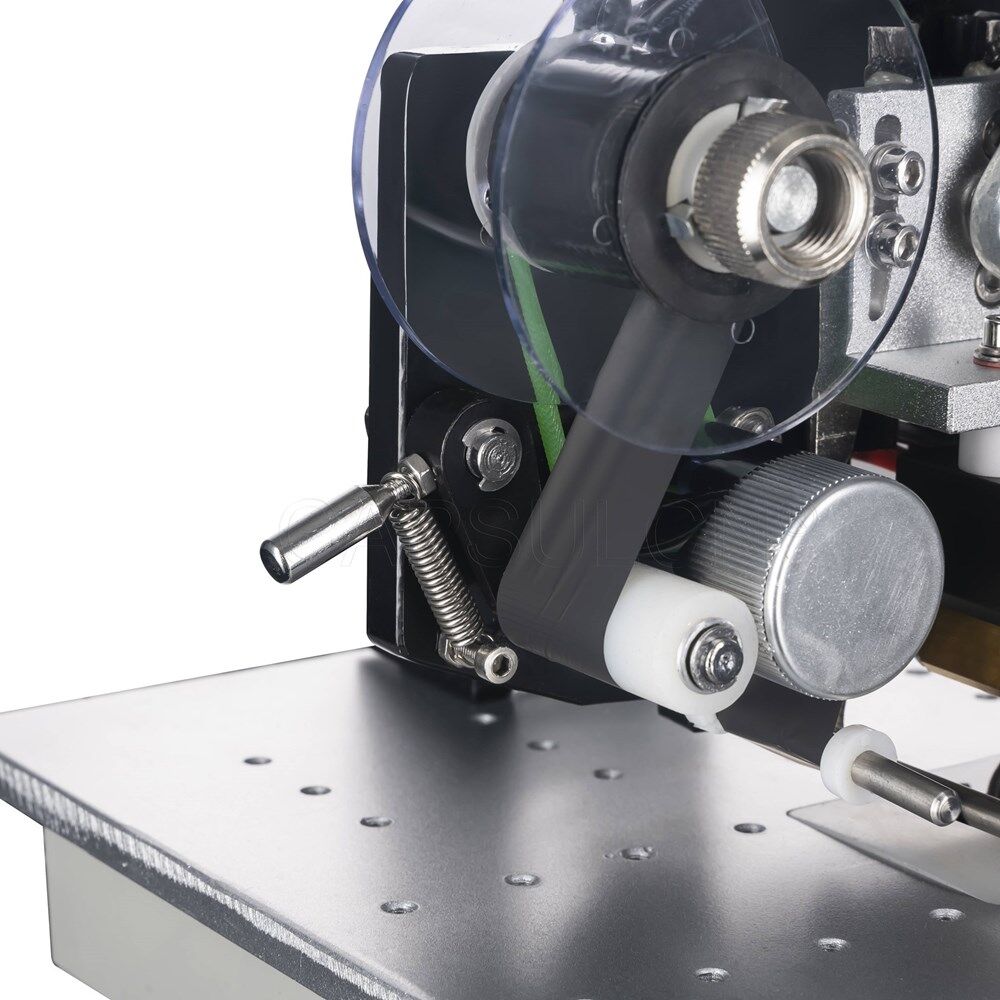
Installation and adjustment
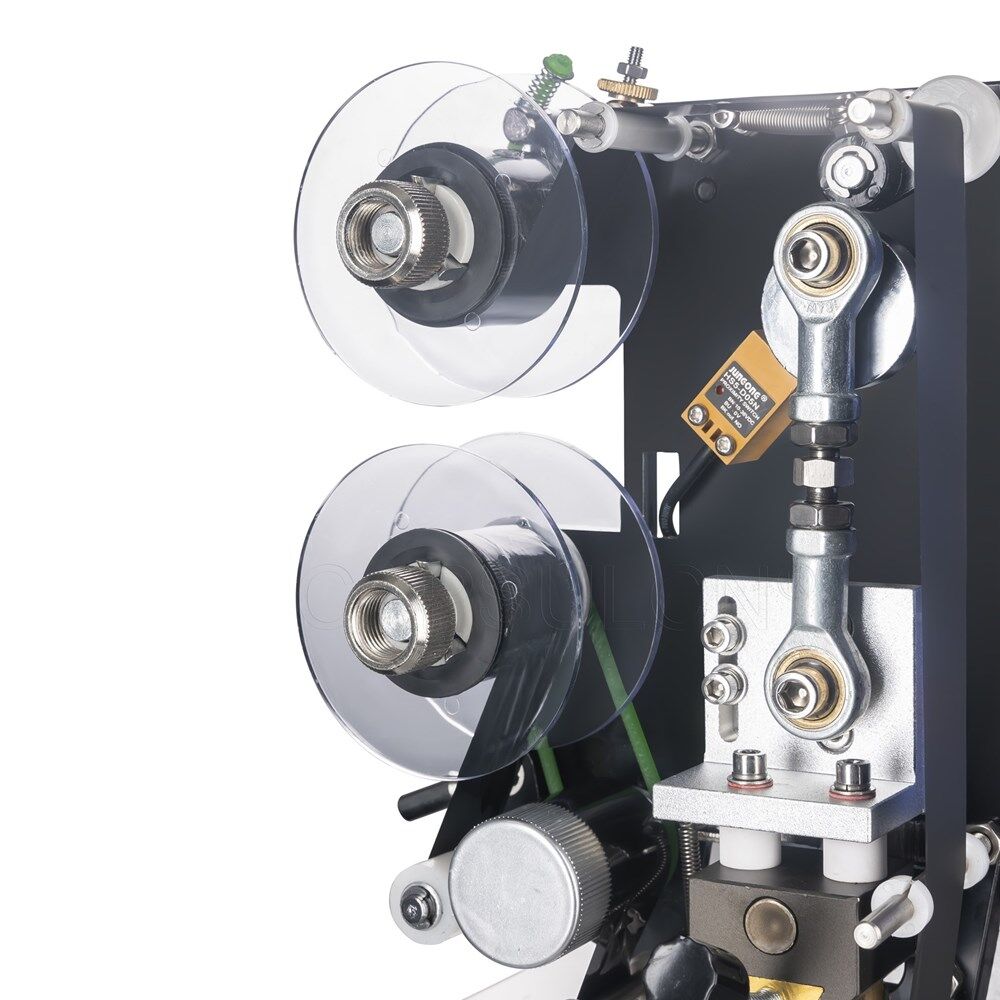
Mounting ribbon
Loosen the wheel nut and apply a little force to pull out the outer reel and ribbon core; install a new ribbon. Put the outer reel and the wheel nut back into the shaft in turn to make contact with the damper disc.
The ribbon is wound in the order of the red line of the structure diagram, and finally the sticker is attached to the empty paper tube in (6). When installing the ribbon, be sure to turn the ribbon surface toward the center of the shaft and roller. When the ribbon passes between (27) and (28), the compression (4) should be pulled upwards to make (28) slightly away (27). After the ribbon has passed, release (4), (28) resets itself under the action of a spring.
Change the ribbon width
The position of the plastic outer retaining ring on the belt guide shaft should be adjusted so that the distance between the two retaining rings is about 1 mm wider than the ribbon.
Link length adjustment
Depending on the thickness of the printed matter, the length of (9) should be adjusted accordingly. At this point, the two nuts of the double-headed screw of the connecting rod should be loosened. Since the thread of the double-headed screw is left-handed and right-handed, the length of the connecting rod can be changed by simply pulling the hexagonal column of the screw. The correct length of the connecting rod should be such that when the head is at the lowest position, the movable type is 0.5 lower than the highest point of the material to be printed. To do this, place the printed object on the rubber plate and turn it with the Allen key (8) to the bottom dead center position. At this time, when the hexagonal column of the double-headed screw is pulled to make the printed object by hand, there is a slight resistance, indicating that the gap between the movable type and the printed matter is substantially eliminated. At this time, in the direction of the extension of the connecting rod, the third to fourth ribs of the hexagonal column are pulled, and then the nut is locked.
Note: Changes in link length can affect the printing pressure. If the pressure is too high, the printing ribbon will be broken and the printed material will be crushed; if the pressure is too low, the printing will be unclear. Therefore, the operator must pay attention to the length adjustment of the connecting rod.
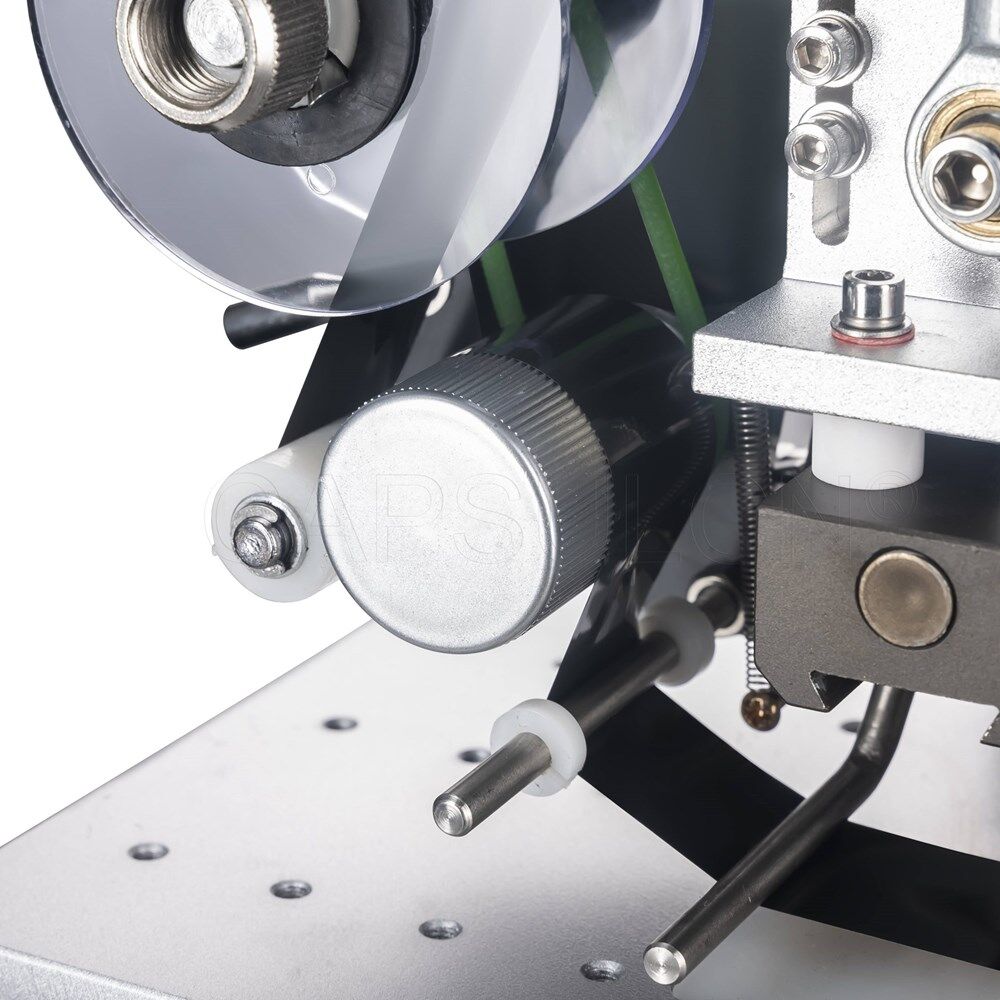
Ribbon step adjustment
When (25) reciprocates once, (27) is turned counterclockwise by an angle by a (19) fixed to the right angle bracket, (17) and a one-way motion mechanism, thus driving the ribbon to a distance, the distance Called the step size. If the step size is too large, the ribbon is wasted and the step size is too small, resulting in unclear printing. The optimal step size should be 1 mm larger than the total height of the word column.
In order to adjust the ribbon step, the butterfly nut of (20) should be loosened. The upward movement can reduce the step size, and the downward movement increases the step distance. After adjusting, the wing nut should be tightened.
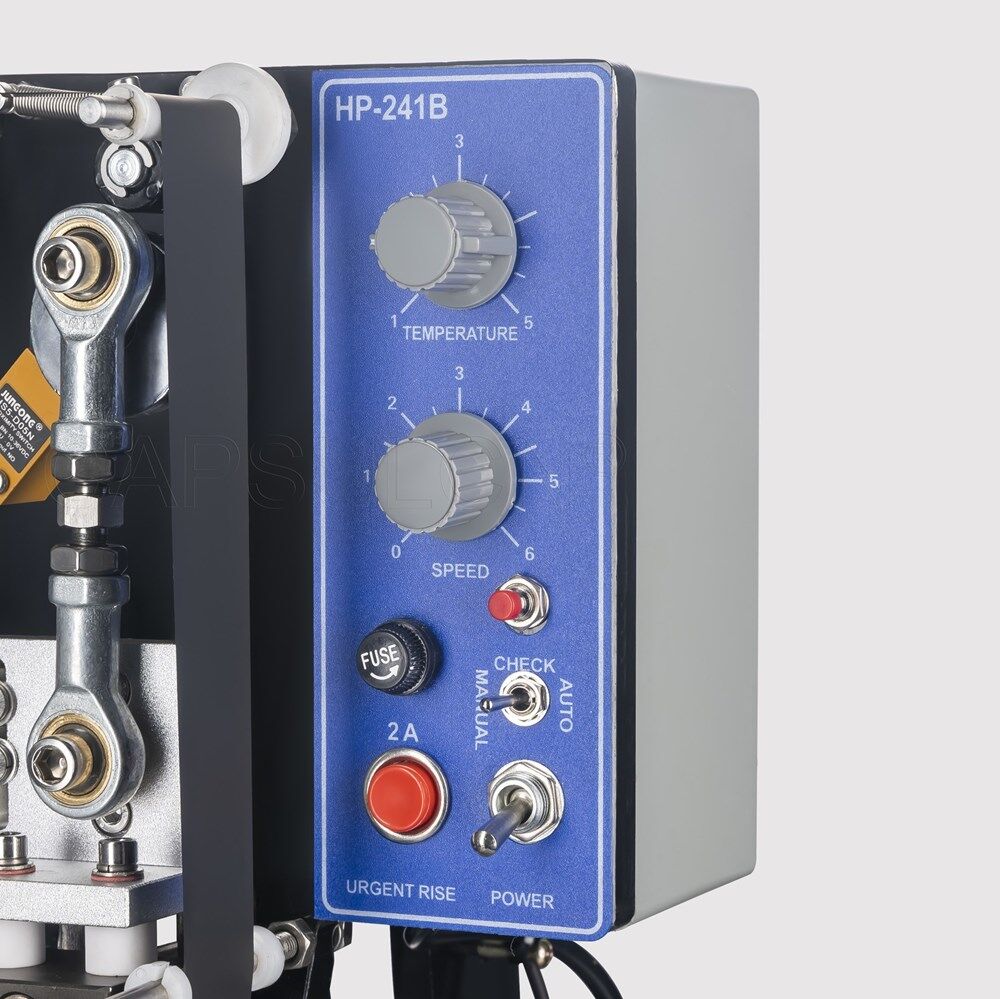
Temperature adjustment
When the temperature adjustment knob is turned clockwise, the temperature rises; when turned counterclockwise, the temperature decreases.
The machine warm-up time is about 15-20 minutes. If it is used urgently, the temperature can be adjusted to the maximum value. After the temperature is reached, the temperature can be adjusted back to the original position to shorten the warm-up time.
Note: Since the machine adopts the principle of time temperature control and is affected by material properties, thickness, environment and other factors, the optimum temperature should be confirmed according to the printing effect.
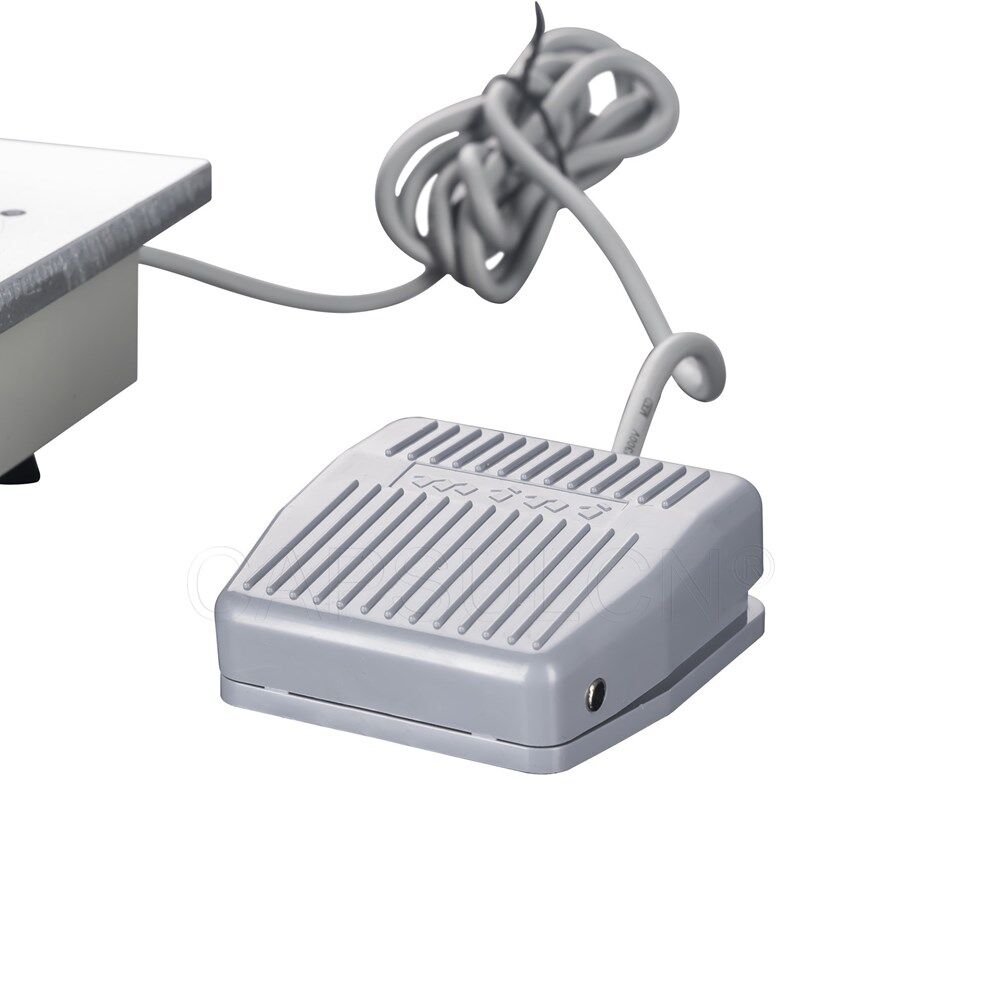
Control mode and print speed adjustment
This machine can choose two control methods: “continuous” or “speed control”. When the control switch is turned to the left to "speed control", the machine is controlled by the foot switch, and the operator pedals once, then the printer prints once.
When the control switch is turned to the right to "continuous", the machine automatically prints, that is, prints once every interval, and repeats. The speed knob on the control panel is used to adjust the print speed. Turn clockwise and speed up; turn counterclockwise and slow down. With the rotation of the speed knob, we can arbitrarily choose the print speed between 10-100 beats/min.
Use of the "Check" and "Emergency Rise" buttons
When the printer is in the printing process, the life word and the printed matter are stuck or other emergency abnormal conditions, press the "emergency rise" button, the printer motor will immediately reverse, which will drive the print head back to the top dead center position. The card can be taken out and the work can be resumed after the fault is removed.
Use of the "Check" button. When debugging the ribbon step, printing effect and debugging the machine, you can use the "foot" control, so that the code machine can be jogged, but you can generally press the "check" button and press it. The code machine can also be used once, which is often more convenient.
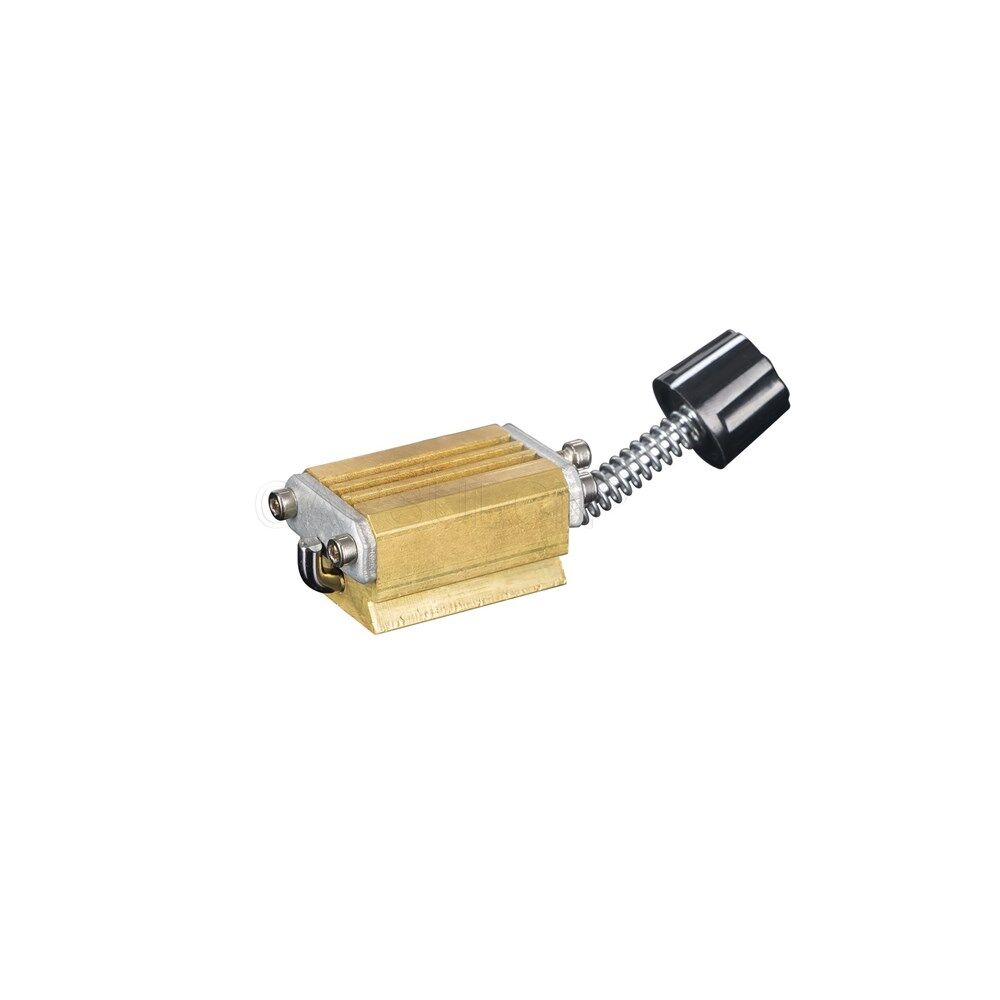
Change word
Push the print head handle (1.5-2mm) inward and turn the handle 90°-180°. Disengage the hook head, pull out the print head, loosen the fixing screws on the movable seat, replace (26), the installation should be high and low, not skewed, and then installed in the reverse order. Do not hit with a metal rod (26) to avoid damage.
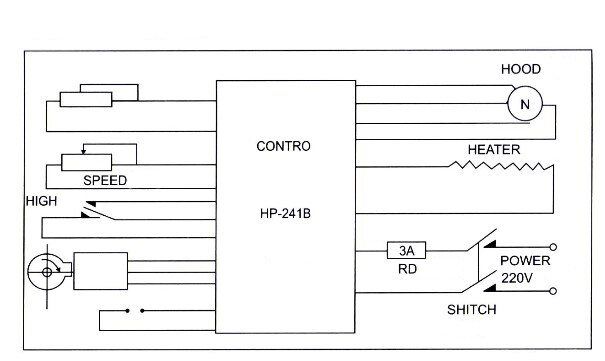
Electrical diagram
 FAQ
FAQ
The printing machine is not clear, what is the cause?
1.The temperature is too low, the warm-up time is insufficient, and the warm-up time needs to be lengthened.
2.The connecting rod is not properly adjusted, and the connecting rod needs to be adjusted to increase the pressure.
review(s)
Good Printer
It can be printed automatically, very fast, and once you set the parameters perfectly, he can be a perfect machine.
From: Guest | Date: 10/8/2019 3:45 AM
Write your own review
Also Offers


Containment Automatic Capsule Filling Machine SFK-703

Fully Automatic Dosator Capsule Filling Machine CZ-40


Related products


Hot Ribbon Coder Printer HP-241B


Our Team
As an expert in the pharmaceutical and pharmaceutical packaging industry, iPharMachine has provided solutions for hundreds of pharmaceutical and health product manufacturers for 17 years. By visiting customers, we get good reviews from our customers.
- info@ipharmachine.com
- English Español Deutsche
