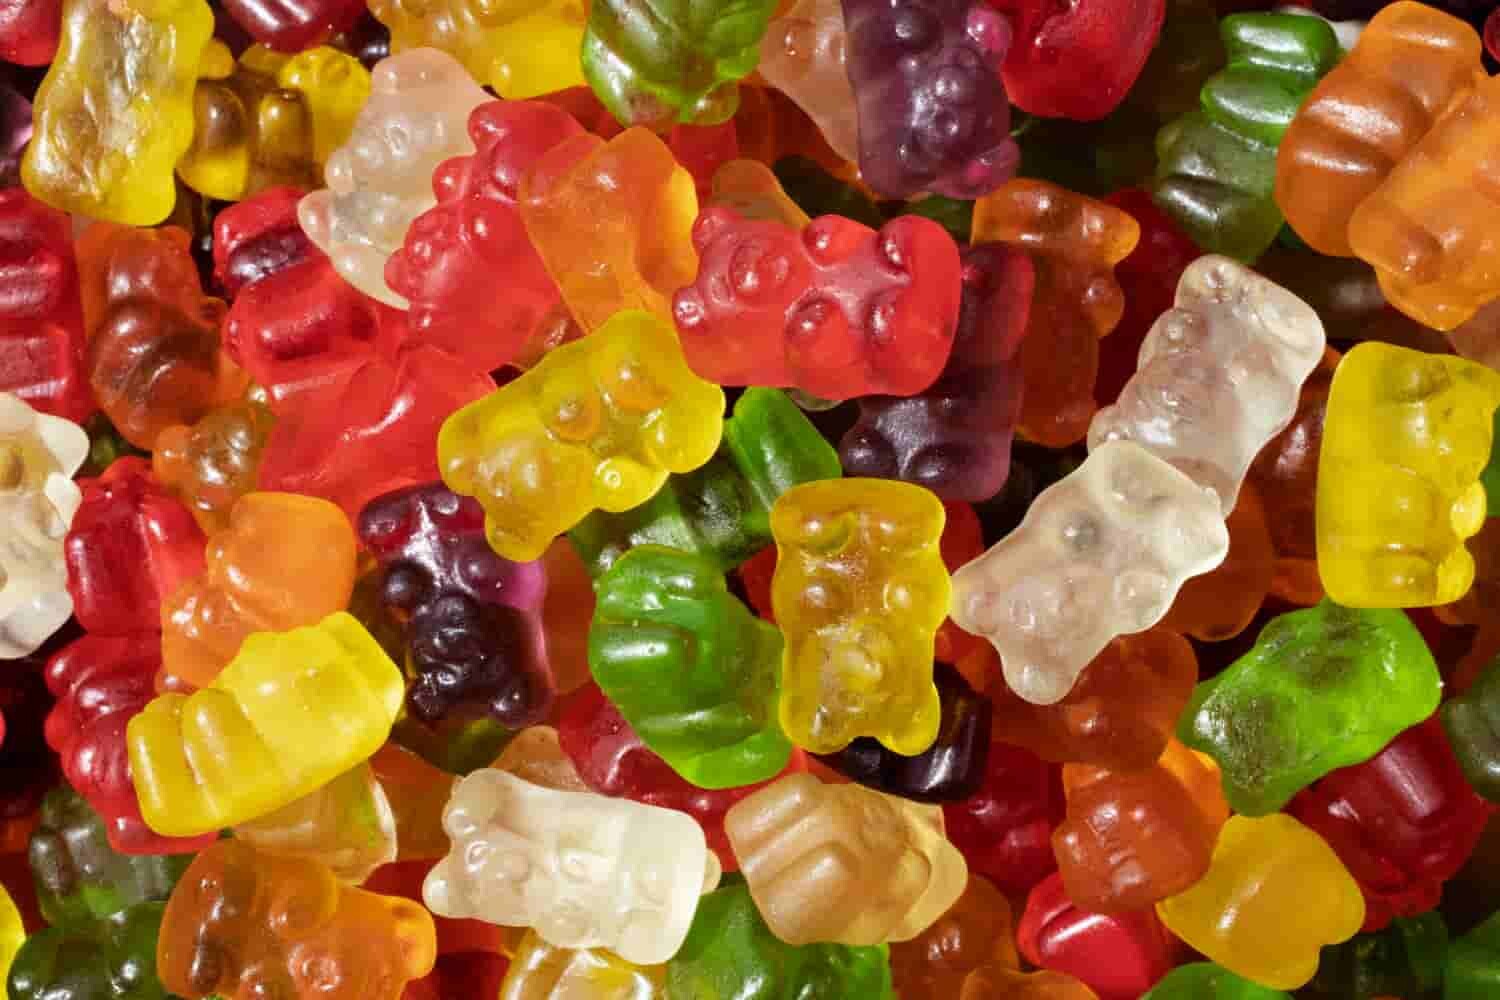
Gummy Bears Making: Key Equipment & Ingredients
Gummy bears are one of the most sought-after sweet treats for all ages. These cute, chewy candies always offer your taste buds a sweet delight. Yet, have you ever wondered how these gummy bears are made? Today, let's go behind the scenes of the gummy-making process. Whether you're eager to DIY gummy bears in your kitchen or curious about how to create them on a production line, this guide has got you covered.
How to Make Homemade Gummy Bears Step by Step?
Making gummy bears at home can be fun for both kids and adults. It also offers a range of benefits. How do you make the best homemade gummy bears? Using the proper recipe and following the instructions carefully are the keys. Are you looking to share your homemade sweet goodness with family and friends? Just keep reading!
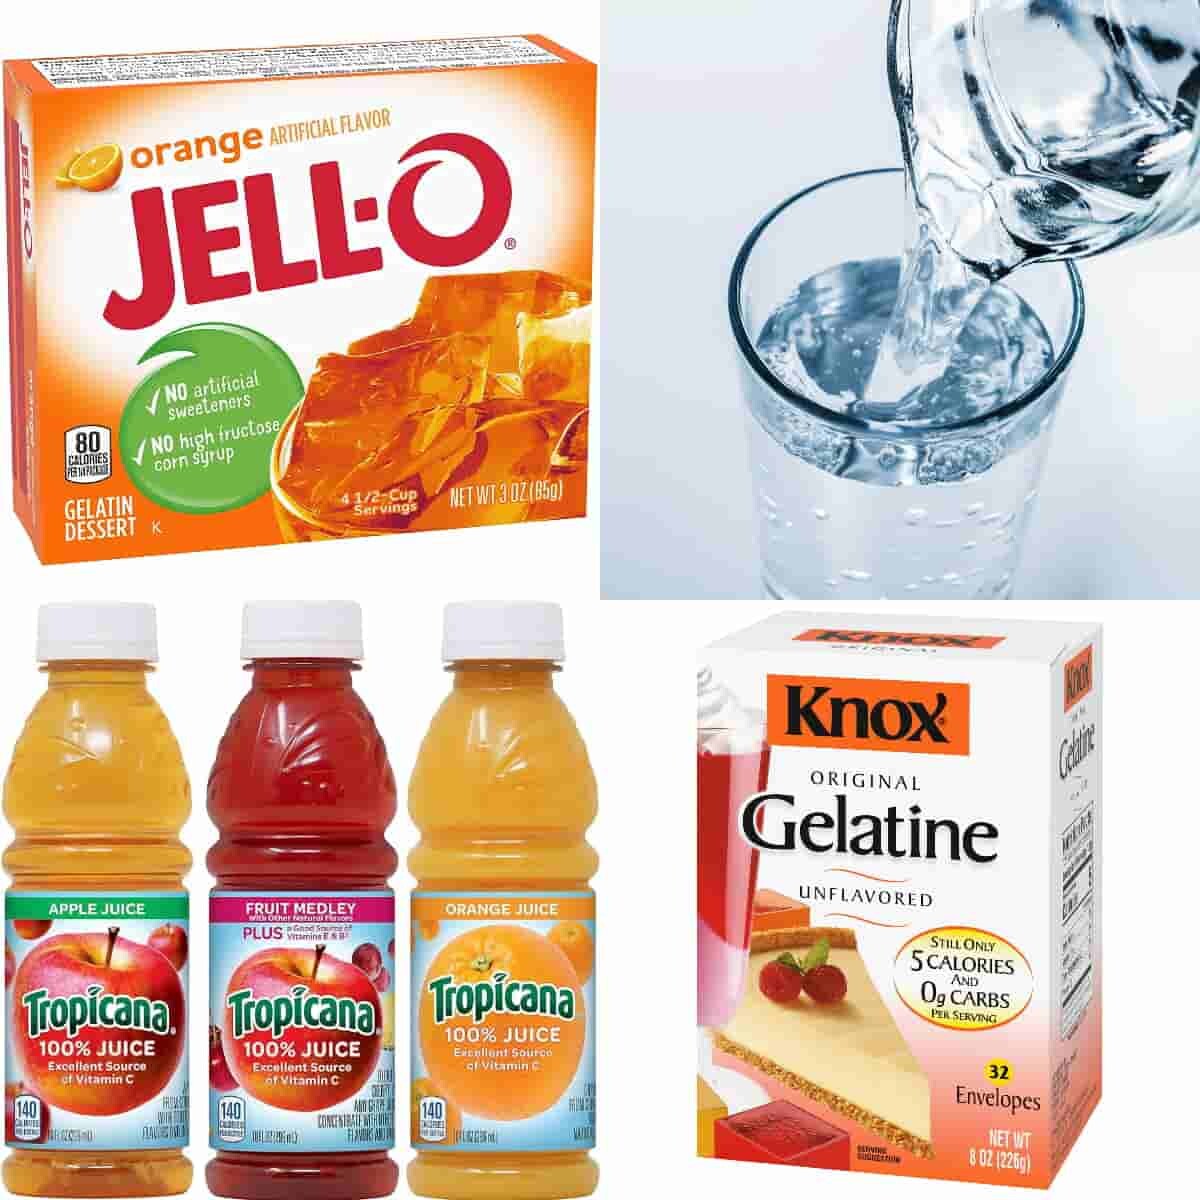
INGREDIENTS
OR
|
|
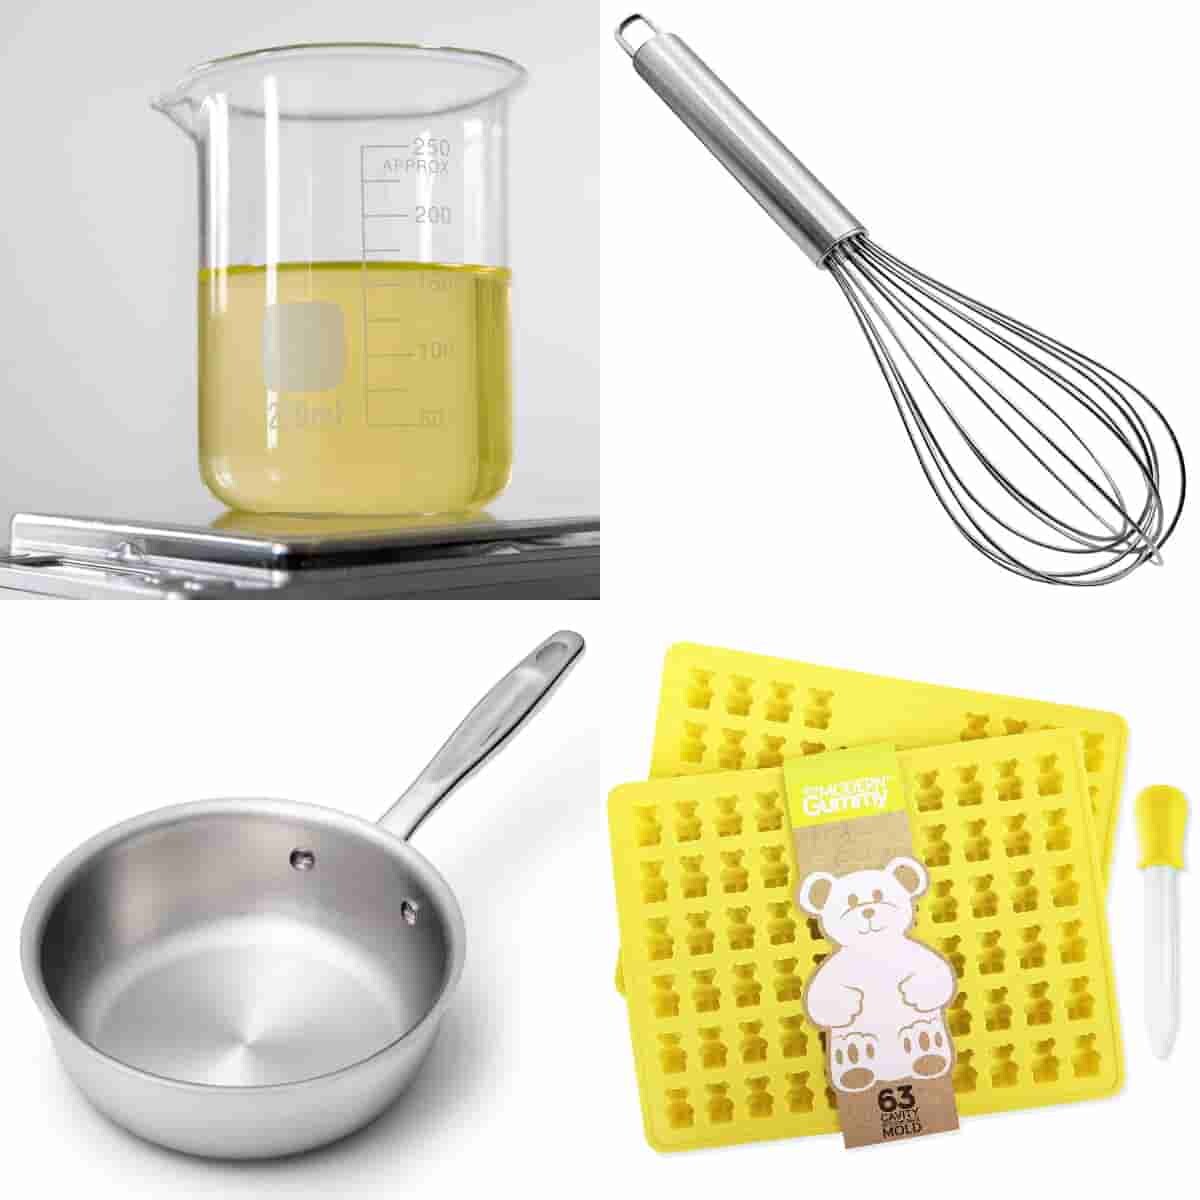
EQUIPMENT
|
|
INSTRUCTIONS
|
Process |
Description |
|
STEP 1: Prepare the ingredients. |
— Gather all the required ingredients (jello, gelatin, water, etc.) and equipment (gummy bear molds, dropper, etc.) on your bench. |
|
STEP 2: Mix the ingredients. |
— Pour the flavored jello, unflavored gelatin, and cold water into a saucepan. — Use a whisk to fully mix all the ingredients. — Let the mixture sit and thicken for 5-10 minutes. — The step takes place at room temperature. |
|
STEP 3: Heat the mixture. |
— Set the saucepan on the stovetop. — Use the stove to heat the mixture over low heat. This usually only takes about 2 minutes. — Note that the mixture should be whisked continuously until it's completely dissolved. |
|
STEP 4: Fill the molds. |
— Move your saucepan off the heat. — Use a dropper to transfer the gummy mixture. — Slowly fill each silicone gummy bear mold to the top. — Here, we recommend not filling the mold to the very top. This helps you get a prettier little bear with a smooth back. |
|
STEP 5: Chill until set. |
— Place the filled gummy bear molds into your fridge. — Let them chill in the fridge for at least 30 minutes to 1 hour until they've set. — Sometimes, this only takes 15-20 minutes. You can check upon the gummies to see if they are firm. |
|
STEP 6: Pop out of molds. |
— Once set, gently push from the back of the silicone molds to remove the gummy bears. — Here's a tip! Starting at the feet of each bear first allows it to pop out of the molds more efficiently. |
|
STEP 7: Store the gummies. |
— Properly seal your gummy bears in an airtight jar or bag to prevent air and moisture from entering. — Then, put the jar or bag in your fridge or a cool, dry place. — If stored correctly, your homemade gummy bears can last up to two weeks. |
Benefits of Making Homemade Gummy Bears
Control Over Gummy Ingredients and Freshness. You can opt for high-quality ingredients such as organic and natural ones. This ensures that your recipe is fresh and free from artificial flavors, colors, and preservatives.
Design your own gummies. This allows you to try out different flavors, colors, and textures. You can customize gummy delights for party favors and special events. In addition to sweet treats, you can even add vitamin supplements to homemade gummy bears based on health goals.
Cost-Effectiveness. Making gummy bears at home can be less expensive than picking them up from the grocery store. It can save you a lot of money as long as you have the necessary skills and sufficient time.
How to Make Gummy Bears on a Commercial Scale?
Making gummy bears at home is a fun activity with your friends and family. But if you're looking to start a successful gummy business, knowing how to make gummy bears with proper industrial equipment is essential. Whether you're new to the world of gummy bears or aiming to produce better products, the following section will offer you valuable information.
INGREDIENTS
- Gelling agent: Gelatin, agar-agar, or pectin (the latter two are great vegan or vegetarian gelatin substitutes). Provides a chewy texture for your gummy bears.
- Sweeteners: Refer to sugar or sugar substitutes like glucose or sorbitol. Sweetens the gummy candies. For sugar-free options, artificial sweeteners like Aspartame.
- Water: Aids in fully mixing the ingredients to create a gummy mixture with consistent flavors and colors.
- Flavorings: Create distinct tastes, such as sweet, sour, or spicy, for gummy bears. Use natural or artificial flavors for different needs.
- Colors: Food-grade ingredients. Contribute to the visual appeal of gummies.
- Acids: Such as citric, malic, or tartaric. Balance flavors. Aid in the gummy setting process.
- Optional vitamins and minerals: For making dietary supplement gummies. Provide additional health benefits.
EQUIPMENT
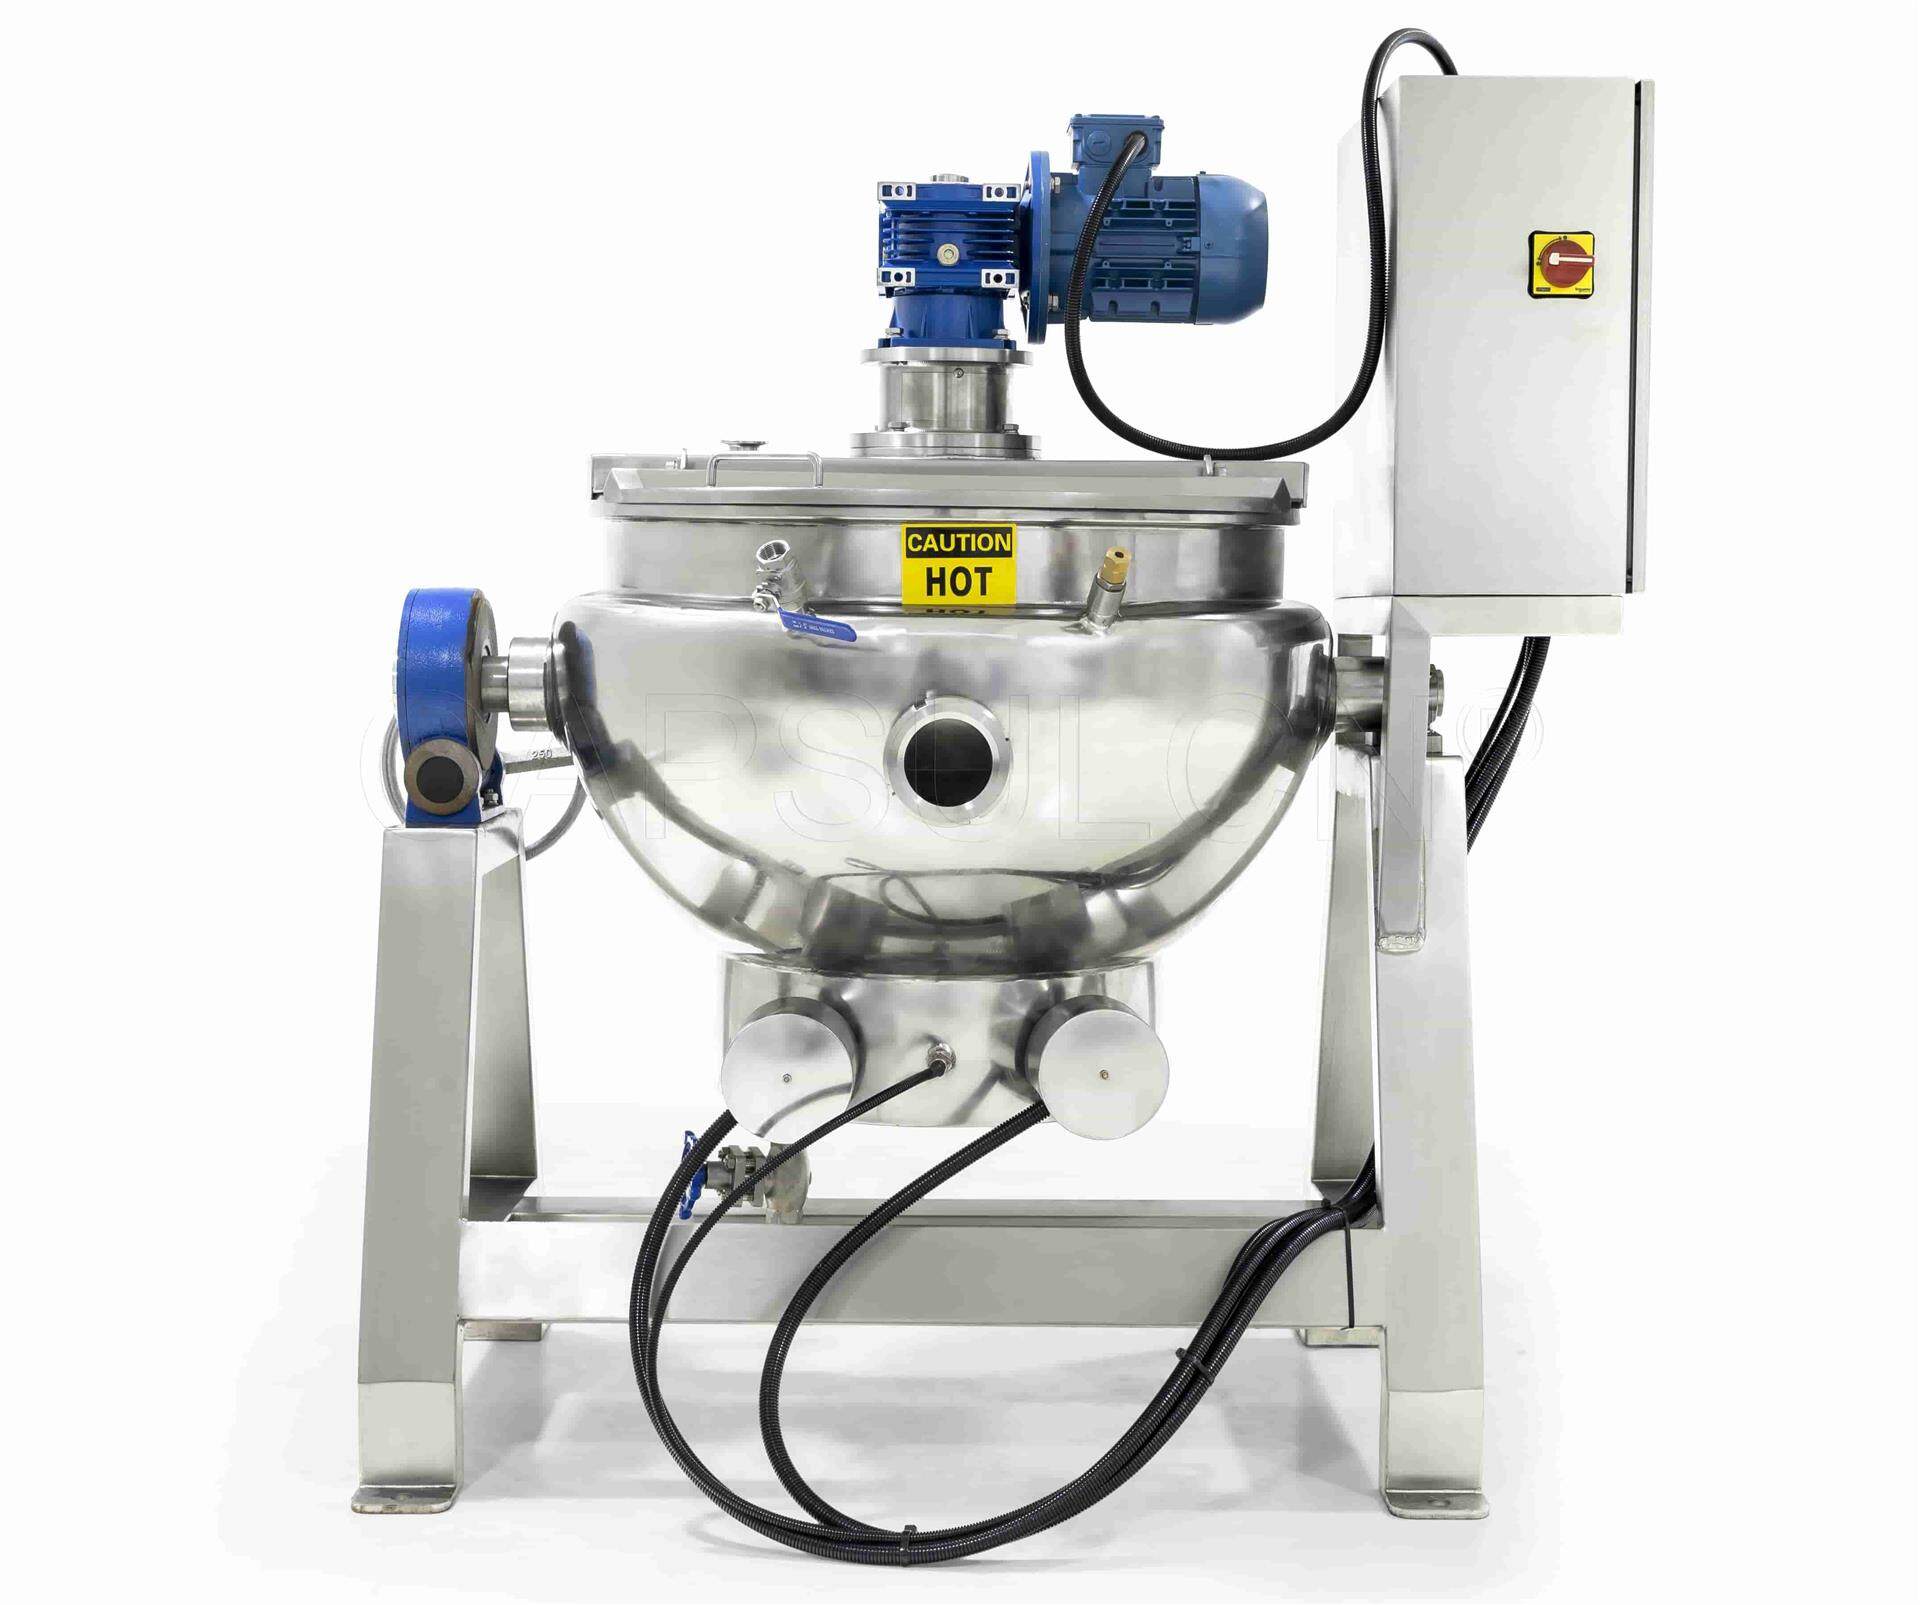
Cooker: Used to cook and mix all the ingredients at a specific temperature. Forms a homogeneous mixture for the gummy bear manufacturing process.
Storage and mixing tank: Combines three functions in one tank. Store the gummy mixture while continuing to blend and heat it.
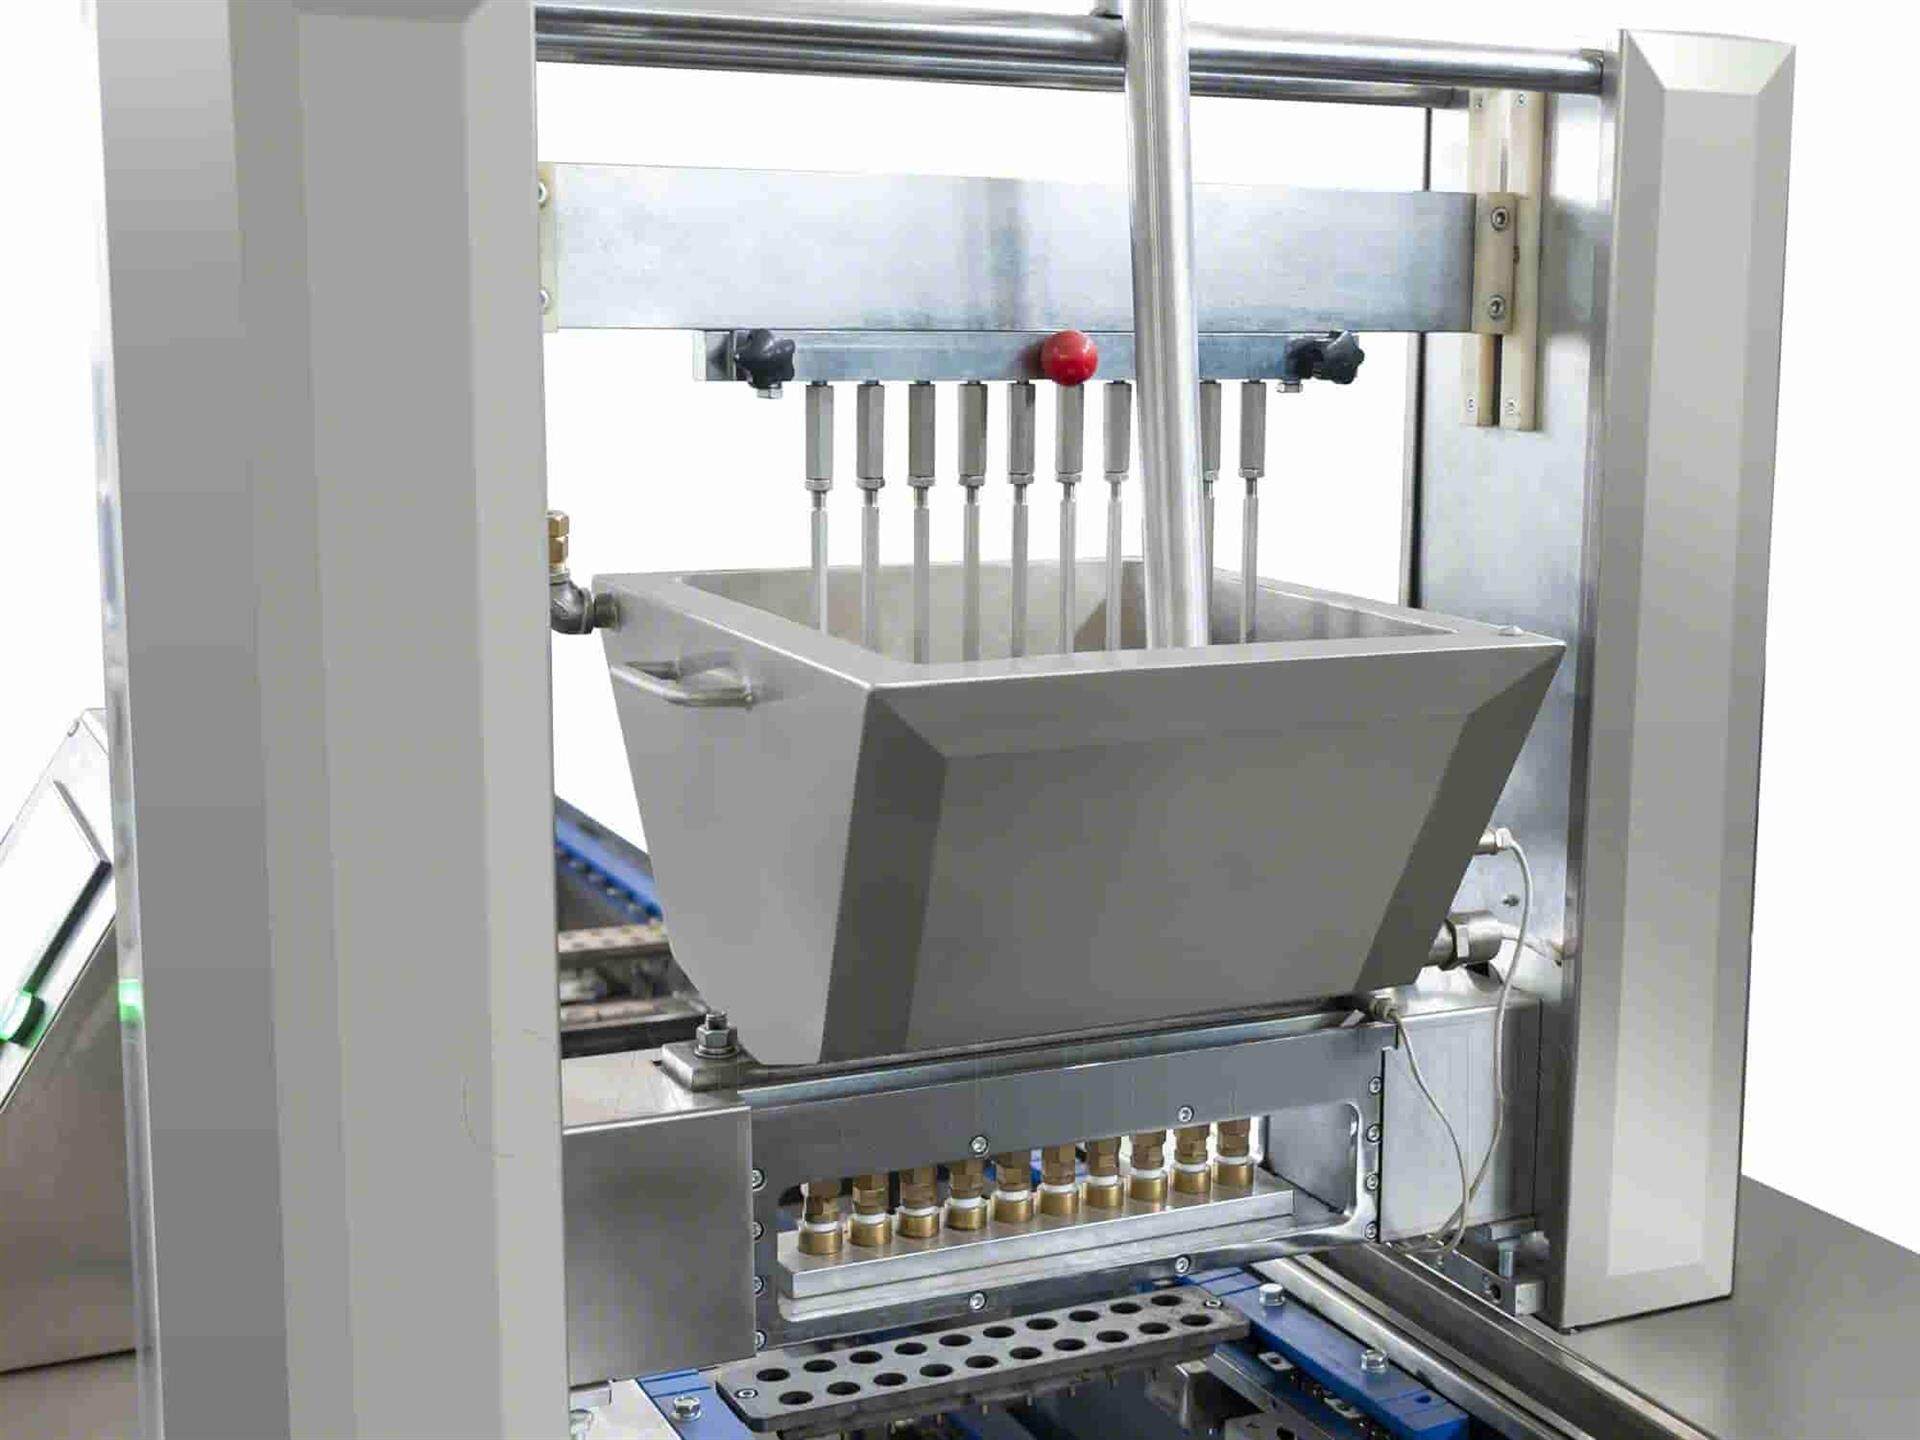
Depositing machine: The critical part of a gummy production line. Consists of a hopper to store the gummy mixture and multiple nozzles to deposit liquid into molds automatically. If you're using a semi-automatic candy depositing machine, step on a foot pedal switch to dispense the mixture.
Gummy molds: Typically crafted from food-grade silicone or Teflon-coated aluminum. Customizable. Features a wide range of styles.
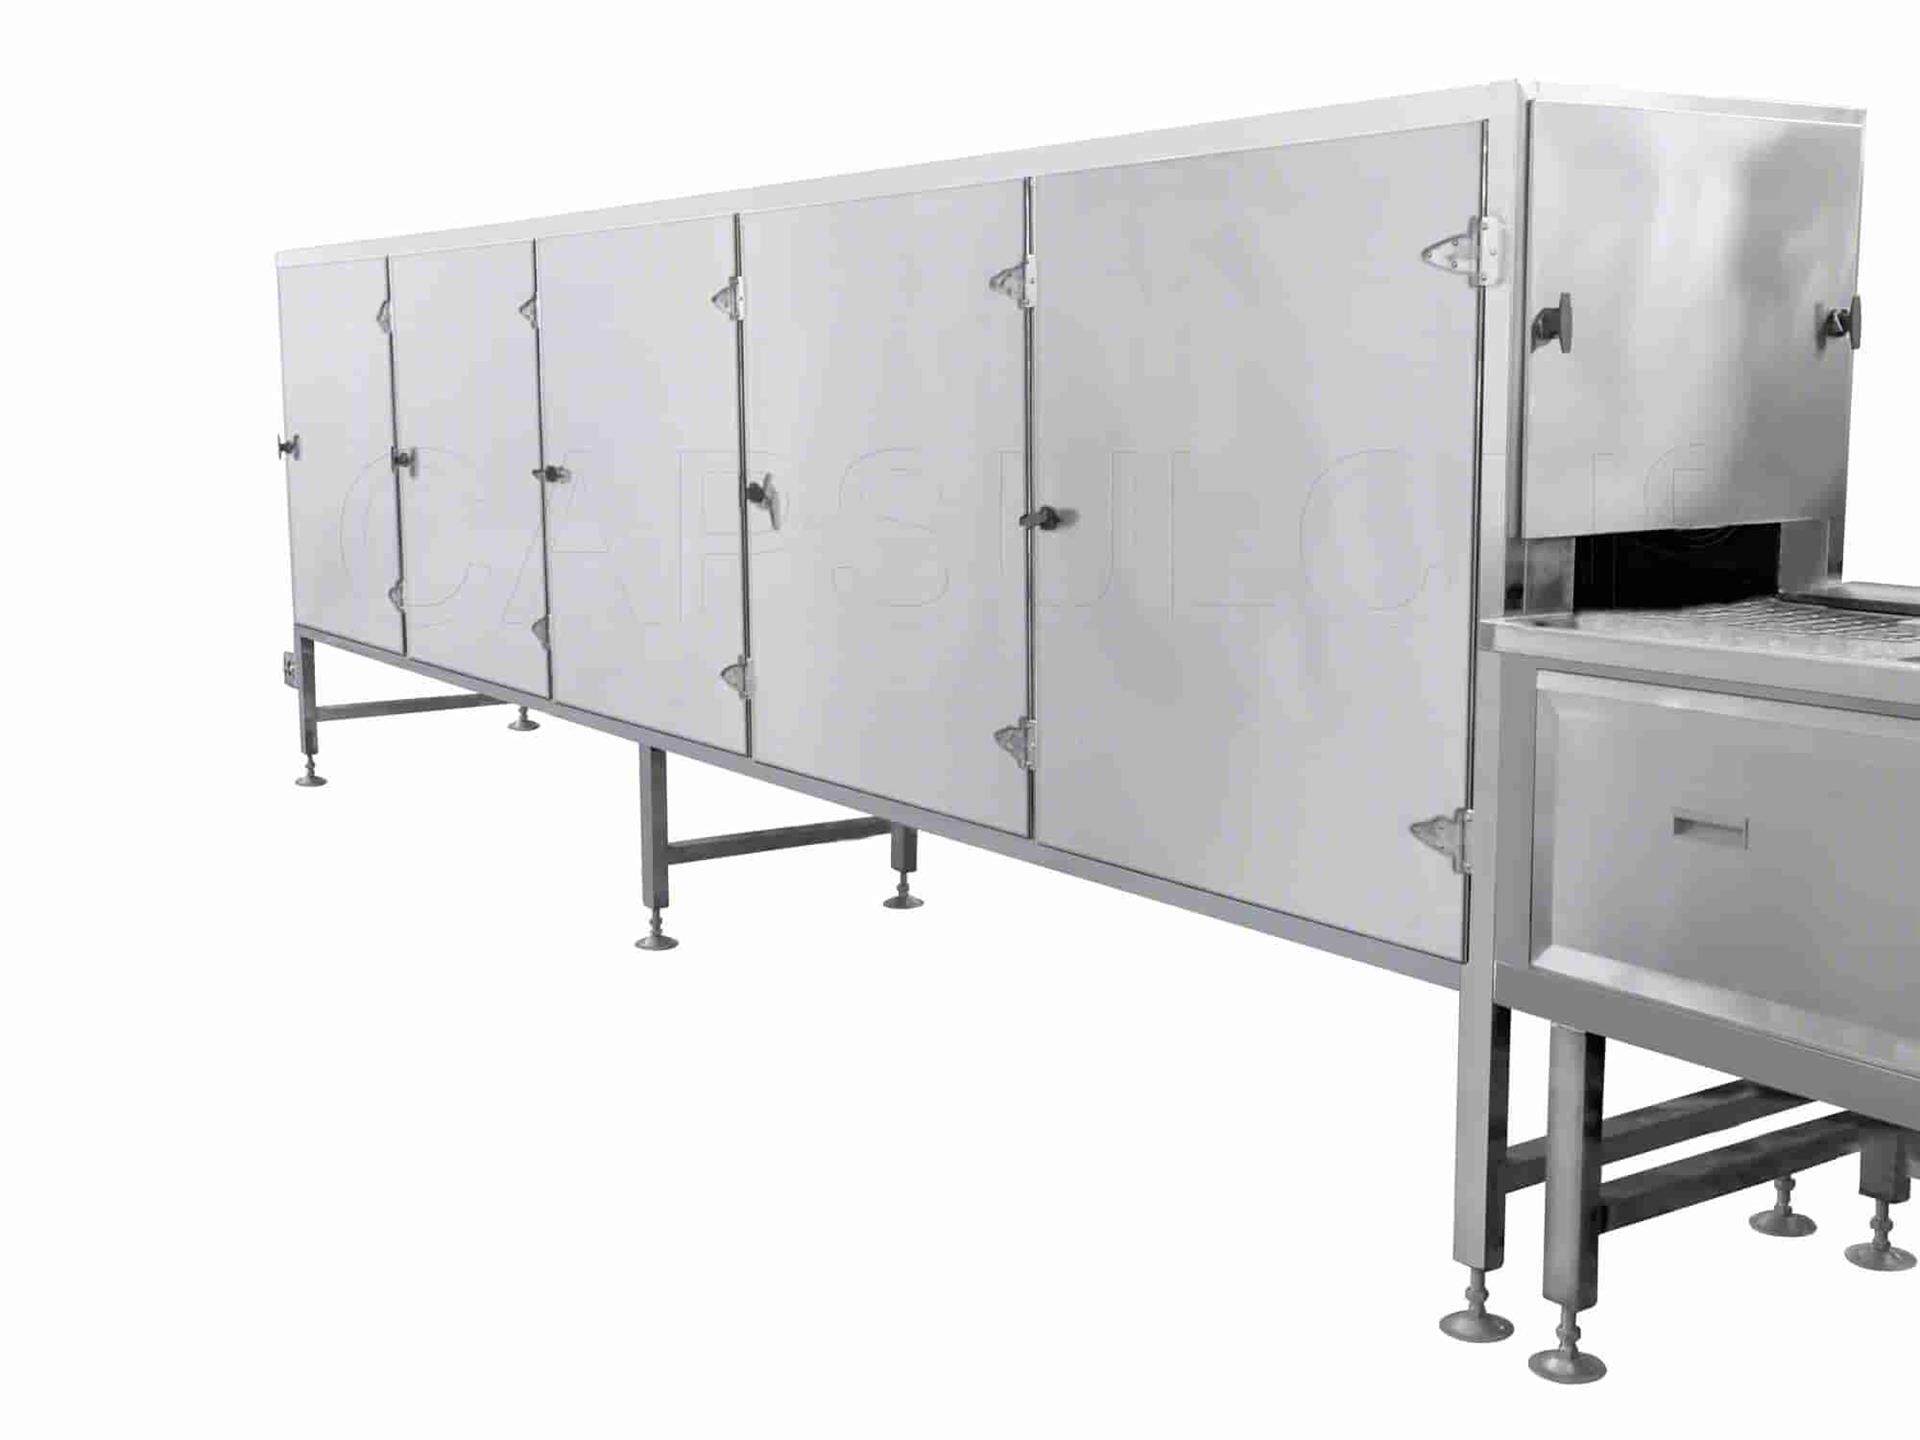
Cooling tunnel: Incorporates a conveyor. Transfer the molds filled with gummy bears through the tunnel to cool and set the gummies.
Demolder: Allow the finished gummy bears to pop out of the molds.
MANUFACTURING PROCESS
|
Process |
Description |
|
STEP 1: Develop the recipe. |
— Determine the shape, size, flavor, texture, and output of your gummy bears. — Are your gummies non-vegan or vegan? Do they just deliver sweet delights or come with nutritional value? — Simply put, the first step is to determine what kind of gummy bear you will produce. |
|
STEP 2: Prepare ingredients. |
— Gummy ingredients vary depending on your recipe. — Since this time is for making gummies for fun or personal use, be sure to source quality ingredients that meet food industry standards. — In addition, make sure the ingredient quantity can hold up for large-scale gummy production. |
|
STEP 3: Cook and blend. |
— Pour all the ingredients into a cooker. — This jacketed kettle heats and mixes the ingredients at a precisely controlled temperature — A homogeneous gummy mixture is produced in the cooker. |
|
STEP 4: Transfer for storage. |
— Once cooked, the mixture is placed in a storage tank. — The tank is used for storing the gummy mixture for the next step. |
|
STEP 5: Deposit the ingredients. |
— Transfer the gummy mixture from the storage tank to the hopper of a depositing machine. — The equipment fills all ingredients into gummy bear molds using a set of depositing nozzles. |
|
STEP 6: Cool and set. |
— Once depositing is complete, an incorporated conveyor transfers the molds to a cooling tunnel for setting and curing the gummies. |
|
STEP 7: Demold. |
— After cooling and setting, gummy bears are removed from the molds by a demolding device. |
|
STEP 8: Package. |
— In commercial gummy production, the final step is typically to package the finished product. — After popping out of molds, the gummy bears are conveyed to the packaging area. — They will be either bottling or pouching in an airtight container. |
Final Thoughts
So, how to make gummy bears? Whether for homemade or commercial production, high-quality ingredients, scientific workflow, more practice, and the right equipment, none of them can be dispensed with. Good luck on your gummy-bear-making journey! If you have any questions, we are happy to help!
Leave your comment
Also Offers


Containment Automatic Capsule Filling Machine SFK-703

Fully Automatic Dosator Capsule Filling Machine CZ-40


Our Team
As an expert in the pharmaceutical and pharmaceutical packaging industry, iPharMachine has provided solutions for hundreds of pharmaceutical and health product manufacturers for 17 years. By visiting customers, we get good reviews from our customers.
- info@ipharmachine.com
- English Español Deutsche